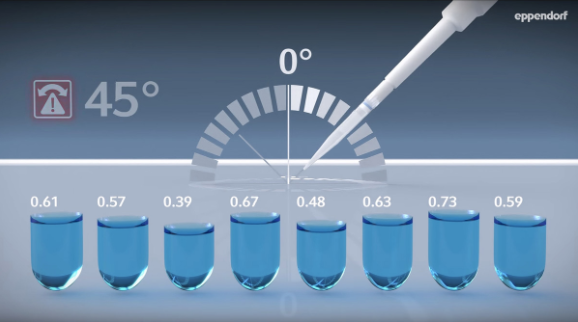
When pipetting volumes from 0.2 to 5 µL, pipetting accuracy and precision is of utmost importance a good pipetting technique is essential because handling mistakes are more obvious with small volumes.
As more focus is being placed on reducing reagents and costs, smaller volumes are in high demand, e.g., for the preparation of PCR Mastermix or enzyme reactions. But pipetting small volumes from 0.2 – 5 µL sets new challenges for pipetting accuracy and precision. The following points are essential:
- Pipette and tip size: Always choose the pipette with the lowest nominal volume possible and the smallest tip to keep the air cushion as small as possible. When pipetting 1 µL e.g., choose a 0.25 – 2.5 µL pipette and matching tip rather than a 1 – 10 µL pipette.
- Calibration and maintenance: It is essential that your pipettes are properly calibrated and maintained. Small adjustments and broken parts on a pipette lead to a massive increase in systematic and random error values. A calibration according to ISO 8655 must be performed once a year.
- Positive displacement pipettes: Check if you have a positive displacement pipette with a low volume range in your lab. In general, using this type of pipette leads to a better pipetting result in terms of accuracy and precision than with classic air-cushion pipettes.
- Try to use larger volumes: You may consider diluting your sample to pipette larger volumes with the same quantity in the final reaction. This can reduce pipetting errors with very small sample volumes.
In addition to a good tool, the researcher must have a very good pipetting technique. Pay special attention to the following steps:
- Tip attachment: Do not jam the pipette onto the tip as this may damage the fine tip end cause the liquid beam to be redirected or damage the orifice. Only apply light pressure when attaching a tip and use a pipette with a spring-loaded tip cone.
- Holding the pipette: Do not hold the pipette in your hand while waiting for the centrifuge, cycler, etc. The inside of the pipette will heat up and lead the air cushion to expand resulting in deviations from the set volume when pipetting.
- Pre-wetting: The humidification of the air inside the tip and pipette prepares the tip for the sample and avoids evaporation when aspirating the transfer volume.
- Vertical aspiration: This is very important when handling small volumes to avoid the capillary effect that occurs when the pipette is held at an angle.
- Immersion depth: Immerse the tip as little as possible to prevent liquid entering the tip due to the capillary effect. Rule of thumb: The smaller the tip and volume, the lower the immersion depth. We recommend a maximum of 2 mm when pipetting small volumes.
- Dispensing at 45° angle: Optimal flow-out of the liquid is guaranteed when the pipette is held at a 45° angle.
- Contact to vessel wall or liquid surface: Small volumes can only be properly dispensed when the tip is held against the vessel wall, or immersed into liquid. Even the last drop from the tip can be dispensed accurately.
- Blow-out: A blow-out is mandatory after dispensing low volumes to dispense even the last drop of liquid present in the tip. The blow-out should also be carried out against the vessel wall. Be careful not to bring air bubbles into the sample when performing a blow-out at the liquid surface.
Post time: Feb-18-2021


